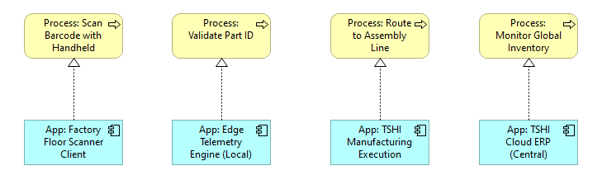
What it shows:
A multi-layered mapping that bridges Phase 1 (Business) and Phase 3 (Application). It explicitly links the deployed software components upward to the specific business workflows they are responsible for executing or supporting.
Why it’s needed:
Impact analysis and license justification. This diagram acts as the primary defence against scope creep and budget cuts. It proves that no software exists in a vacuum—every application being deployed is explicitly tied to a validated business requirement. Furthermore, if a technical failure occurs, this diagram instantly highlights exactly which business processes will grind to a halt.
When to use it:
Highly recommended for SADs and HLDs when deploying enterprise-wide transformations, replacing legacy systems, or rolling out massive COTS platforms. It is essential for proving to project sponsors that the new software stack provides 100% coverage of the required operations.
When NOT to use it:
Generally best to omit for minor software patches, identical “like-for-like” version upgrades, or pure backend infrastructure changes (like upgrading a storage SAN) where the business workflows and the application boundaries remain completely untouched.
Example: